If you prefer watching videos, click here: https://youtu.be/uqBt0HUBuLw
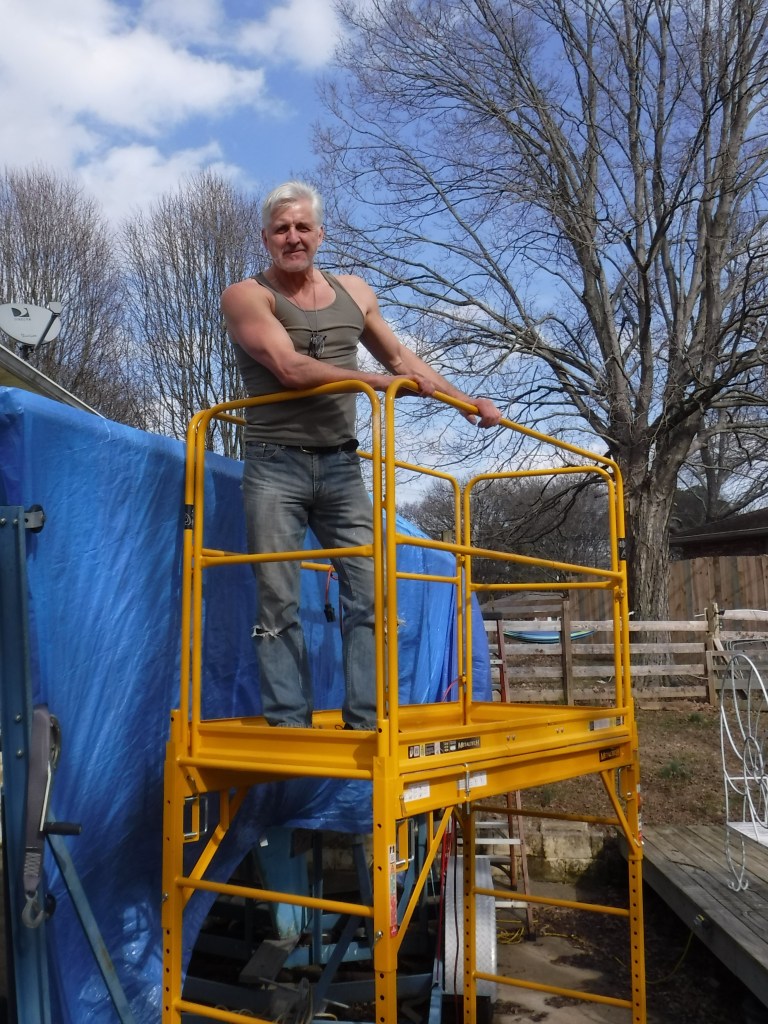
As I mentioned before, when our sailboat arrived at the back door, she didn’t have a name. However, Felicity certainly had her fair share of issues. But let’s be honest, as my photo implies, maybe we all have one or two!
Now, repairing a sailboat, though challenging, can also be a whole lot of fun. And it is perhaps for that reason so many other things seem more important. So, despite the best intentions and meticulous plans fixing Felicity often gets pushed to one side.
While most of her issues are minor, a few are significantly important. And if it weren’t for the internet’s sailing community, Rhonda and I wouldn’t have known where to start. We appreciate your videos and posts very much. They help us keep moving down through our to-do list and closer to sailing Felicity. So, a massive great thank you to all of you!
In my last post, I told you how I went about fixing Felicity’s Catalina Smile. Now, with the keel joint sealed and the surface faired out, she looks and feels great. But all of that work would have been pointless without addressing her corroded keel bolts.
Now, a disclaimer as every situation is different. This post is not meant to be a recommendation. I based my work on the research I did and my assessment of the keel bolts’ condition. I’ll leave you a few links to some interesting reading at the end of this post. It’s helpful to do some research.
I approached this project in three stages. First, I wanted to preserve the existing keel bolts. Second, re-enforce the wooden core of the keel stub.
And finally, sister some new stainless steel bolts into the cast iron keel.
What follows are the thoughts I had about my situation and the work that I did to prevent the old keel bolts from getting worse.
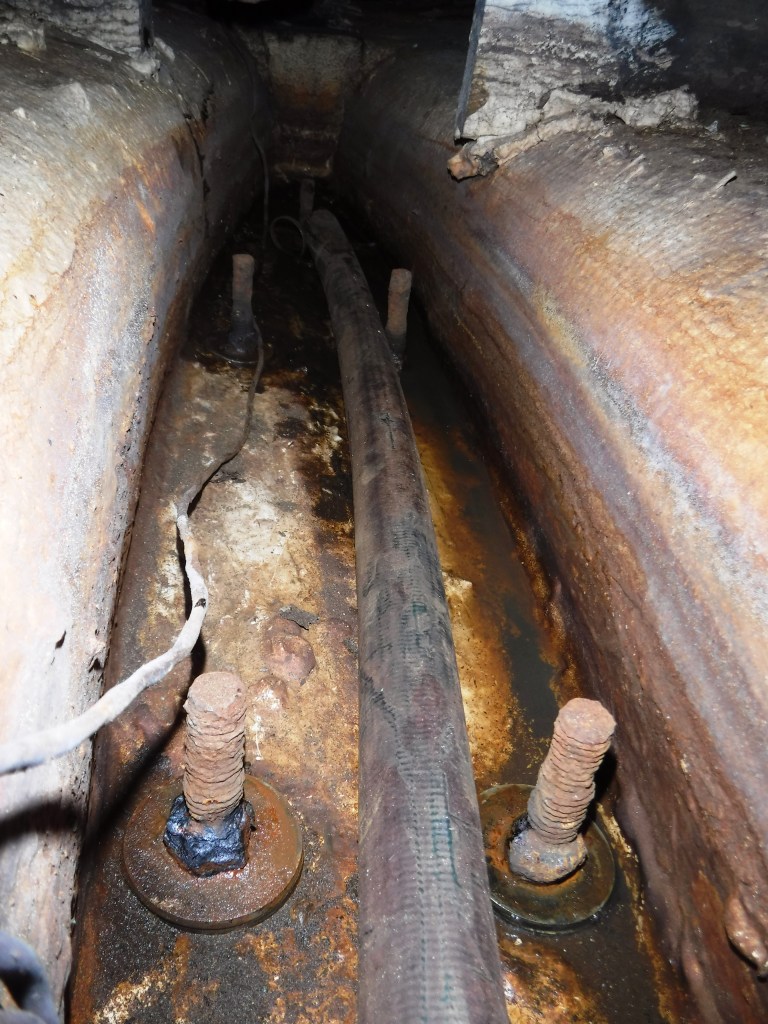
From the outside, the keel joint seemed primarily intact. When I ground back the damaged gel coat, I only found tiny little holes in the seal. And from all that I had read, there was a good chance the bond between the keel joint and the hull was still quite sound. On the inside, the nuts appeared to be fused to the bolts, so removing them wasn’t going to be easy. And with all the activity in our backyard, I couldn’t imagine lifting Felicity off her keel to take a better look at it.
To the best of my knowledge, Catalina’s can have either mild or stainless steel keel bolts. It’s easy to find out since mild steel is magnetic.
But wondering about the bolts’ integrity kept me awake at night. My thoughts seemed to wander, drifting from sensible to ridiculous and back again.
I thought about calling a marine surveyor, and probably will, before we get out on the lake. I also thought about tapping the bolts with a hammer to see if anything broke off. Even taking the “check-out-the-tires-on-a used-car” approach and give the bolts a jolly good kicking. But like I said, the mind tends to wander in the middle of the night.
Eventually, I ground off the end of a bolt to see what lay under the rust. It revealed the bright shiny steel of a healthy-looking keel bolt which I found reassuring. Looking at the shape of the corrosion on the bolt, I guessed they spent a lot of time sitting in a bilge full of water.
To preserve the bolts’ condition, I had to keep out the rain. Leaky deck fittings and portlights allowed water to seep into Felicity’s bilge. Since I still needed access to Felicity’s deck, I put up a makeshift mast, ran a line fore and aft then covered her with a tarp.
To stop the corrosion, I used a rust inhibitor that, according to the manufacturer, works well on rusty surfaces. Fortunately, I didn’t have to grind the bolt back to the shiny mild steel underneath.
I cleaned up the bolts with a wire brush and soapy water, then applied three coats of inhibitor. Each coat took about twenty minutes to dry, changing color from white to black. Once ready, I painted the bolts with galvanizing paint.
Now a bilge full of water, salt, fresh or otherwise, will not only corrode the keel bolts but over time may saturate the wooden core of the keel stub. So in my next post, I’ll tell you how I reinforced the keel stub to prepare for the new stainless steel keel bolts.
Again, if you’d like to see the video, click here, https://youtu.be/uqBt0HUBuLw.
Feel free to leave a comment or ask any questions below.
Thank you so much for visiting my blog, and until next time, jibe on y’all!
Q. Is the water in my bilge from the rain or from the sea
Q. Where can I read about keel bolts?
