 Hello again, readers. I just couldn’t wait to post the story of my anchor locker. I know, it’s exciting for you too isn’t it, that dirty old triangular box at the bow where sailboats store the parking brake.
First I should thank Tomas Kruska who posted his project details on the Catalina International Association forum. After years of home ownership, impatience and irritation where temperamental tantrums became integral to repairing anything, Tomas’s anchor locker project encouraged my efforts, and today the result astounds me.
My boat’s anchor locker had a number of flaws requiring attention if I wanted the forward sleeping quarters below the locker, or V-berth, to become the habitable space it once was. Rainwater collected via the anchor rode notch and seeped down into the V-berth through a bolt hole that once secured the bow eye. Also, the bow navigation lights’ box-shaped covers allowed water into the back of the fittings along with the fittings on the fore-deck. Unless the light covers protected them from a restless anchor under way, I don’t understand the purpose of them either since their shape doesn’t follow the hull’s.
The ceiling of the locker, or underside of the fore-deck serves as an attachment point for the pulpit, fore-stay stem and a couple of other fittings. Many of the bolts leaked and the underside paint had peeled, exposing the fiberglass and/or wood to adverse weather conditions. The anchor locker was, by far, one of the worst places on the boat. This challenging repair was irresistible, and my creative genius unleashed.
Once all of the fittings were out of the way, I scraped off the old paint and gave the locker a jolly good clean. I sanded a lot of the rougher edges down and decided to glass over the light fittings’ inserts and cut out a new hole for them later.
Although I couldn’t find any soft spots on the fore deck the underside looked a little worse for wear. I wanted to improve its integrity by adding some strength from the underside. Using a cardboard mock up, I shaped some plywood to the curve of the deck. This technique I learned from Brian Gilbert’s book “Fix it and Sail.” If you don’t have the book yet, it’s still stands up and you’ll find self-explanatory pictures in my gallery on how I molded the ply.
 I mapped the deck’s curve on a piece of 1 x 6 pine and cut along the line, producing a matching curved edge. After making slits in the top layer of ply, I screwed it down to the template. Once the ply was in place I glassed it with alternate layers of fiberglass cloth and matting. Once it had cured, I removed it from the template and glassed the whole thing. I had a perfectly shaped, very solid composite board which I glued to the underside of the fore-deck. Handyman’s tip: those annoying loan offers that come in the mail supply free construction glue applicators. People are so generous. Anyway, I made sure that I jacked and clamped the board tightly. It became an excellent reinforcement for stainless steel backing plates, washers, nuts and bolts.
For the next step of the project, I wanted to improve the overall appearance of the locker and simultaneously, channel any runoff from the deck. I bored out a hole in the forward end of the locker and installed a thru-hull to the V-berth below. Then, I glassed out the anchor locker, sanded it and painted it with two coats of Rustoleum primer. The final coat of topside paint and a replacement weather-seal finished the job well. My Catalina had a brand new look.

So what about the drain that now led to the V-berth? I had a cunning idea.
I thought about running a tube down to the bilge, but that would mean puncturing a hole in the V-berth bunk floor. I couldn’t find much about anchor locker drains on the internet but I knew it made sense to have one.
Soon I had devised an arrangement of tubing, hose clamps and a couple of thru-hulls. The water now drains out through the bow as it does on much larger vessels. In fact, the whole thing is a great water feature and I’ve posted a video of it here, Water Feature 2.
The most difficult stage of the anchor locker drain was deciding on compatible sizes of tubing. I didn’t know much about plastic tubing and its complex terminology. I still don’t really know how I figured it out but the components I used are listed below.
2 feet of reinforced plastic tubing: 1″ O/D, 3/4″ ID. (Garden hose is less expensive.)
3 ea. Perko 5/8″ Thru-hulls
1 ea. 5/8″ Nylon hose barb/ Tee joint 5/8″
6 ea. Hose clamps/ Jubilee Clips
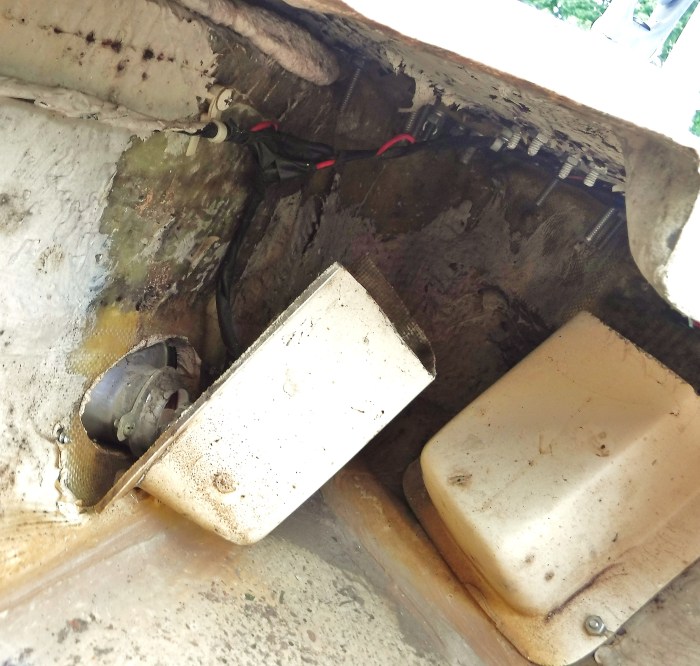
Before and After:


Behind the V-berth locker, you should end up with something that looks a lot like the picture above. Behind my new drainage system, you can see where I painted over the stain caused by the rusty bow eye bolt. Also, water intrusion, over time, had rotted out the V-berth locker panel. Here is a before and after of that!


So hey, fix up the anchor locker. It doesn’t cost much in materials and makes for a more comfortable V- Berth snooze!!
For more pics on “how-to” click here.
Please leave any questions in the comment sections below and I’ll do my very best to help you out. If you’d like to listen to some of my music you could start with this beautifully emotive trumpet piece: Adios
Fair winds!!
Thank you for reading.

Good work my friend! I look forward to sailing with you! Where is the post with your getting sailing certified?
LikeLike
Hey awesome dude. I ain’t certified yet but I may be certifiable. This boat project seems endless. ha ha!!
LikeLike